Subpixel Rendering

You know the problem. No matter what you do you can’t get two elements to line up properly. The connecting points are always off by one pixel.

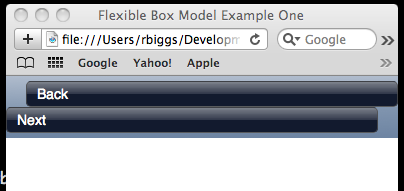
Everyone doing Web development at some point or other comes across a layout problem where no matter what you do, you can’t get two elements to align perfectly. One or the other is always off by one pixel. I was pulling my hair out try to get the pointers on the back and next buttons to align perfectly. They just didn’t look perfect. Worse still, when I used the browser’s “Zoom In” command from the view menu, I could clearly see that the lines did not connect properly.

After hours of fiddling with element sizes and positioning, I was on the verge of giving up. It was then that I remembered similar layout problems that I dealt with when doing Silverlight development. Silverlight is Microsoft’s vector-based, Flash killer/non-killer plugin for creating RIAs. For whatever reason, versiond before 4.0 had terrible problems with exact positioning of elements, causing frequent one pixel disconnects when rendered to screen. The only way to resolve this was to use subpixel rendering. This was accomplished by positioning an element by using partial pixel values, such as 1.5 or 1.25. This would force Silverlight to output the element with subpixel rendering, eliminating the visual disconnect.

OK, so what the heck is subpixel rendering? You experience it everyday with the browser’s font smoothing. You know it as anti-aliasing. The browser looks at the bézier curves of the font and when it sees that a line passes though a pixel, it looks at how much of the pixel is intersected. Depending on the percentage, the browser outputs a percentage of the font’s color. Less means the pixel gets less of the font’s color. For the human eye this creates the illusion of smoother curves.

You can use this same technique to trigger subpixel rendering on an element by giving it percentage-based position, or percentage-based dimensions. Here are some examples:

.button {
    position: absolute;
    left: 0px;
    top: 2.5px;
    height: 23.5px;
    width: 23.5px;
}

Here’s a image of my next button with the browser zoomed in. As you can see the pointer doesn’t line up perfectly with the rest of the button. This caused a slightly noticeable disconnect at normal size as well.

next button with its pointer misaligned

Now here’s the same button with the pointer using position set to top: 2.5px;:

next button using subpixel positioning

Subpixel rendering solved the connect problem I had at all zoom levels, including at normal size. Depending on your problem, subpixel positioning may be enough, or subpixel dimensions may be enough, or you may need to do both. Using subpixel values can help resolve problems when your layouts are not coming out pixel perfect.

You can try this out online or download the source code.

Today’s new technology terms:

subpixel:
   A pixel rendered with a shade of an adjacent element’s color to make it appear as if the element occupies part of that pixel’s space.
subpixelate:
   To force the browser to render an element with subpixel values.
subpixelation:
   The act of forcing an element to render with subpixel values or the condition of being rendered with subpixel values.

Making an iPhone Switch Control without Images

Works on desktop Safari, Chrome and Firefox, iPhone, iPod Touch and iPad.

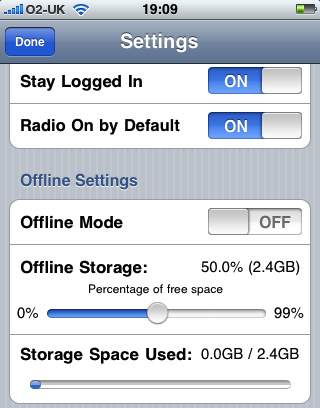
On the iPhone and iPad, Apple uses a control called switch. It’s actually a different take on the checkbox. Like radio buttons, checkboxes do not lend themselves to touch interfaces, especially guys with fat fingers, cough! Instead of making us suffer with those dinky checkboxes, Apple uses a more visual cue to what the user is actually doing, switching something on or off. As a matter of fact, that’s exactly how the control is labeled: “on” or “off”. They’re really easy to use, just swipe your finger to throw the switch, done. In case you’re not sure what I’m talking about, here they are:

switch control

OK, so all the mobile Web frameworks have a switch control. And I hate them all. They either do an instant switch between the on and off state, using an image sprite, or they do this really lame thing where they animate the horizontal background position of the image on a checkbox with its default styles removed. None of those implementations feels the same as when you swipe the switch control in a native iOS app.

So what am I going to do? I tell you, I’m going to throw the friggin’ image out and build the whole control from scratch using just HTML, CSS3 and some JavaScript to make it work. Bada-bing! To start with, here’s the basic markup for a checkbox:

<div class="checkbox unchecked" id="sleepSwitch">
	<div class="on">ON</div>
	<div class="thumb"><span></span></div>
	<div class="off">OFF</div>
	<input type="checkbox" value="ZZZZZZZZ!" offvalue="But, I need more sleep!">
</div>

As we did when we created iPhone style radios buttons, we’re using real checkboxes in our iPhone switch controls. And like in the radio button example, we’ll set the checkbox input’s display value to “none”. We’ll use CSS3 properties to style the markup to look like a real iOS switch control and we’ll attach event listeners to set the input checkbox’s check state to true or false, depending on whether we want it to be selected or not.

To create this switch control we’ll need to style the frame named “checkbox” with rounded corners. Notice that the markup above contains three parts: the on state, the thumb and the off state. The rounded frame will only be wide enough to show one state plus the thumb. Using CSS3 transitions and transforms, a click or touch will cause the three elements to side back and forth within the rounded frame. For positioning the switch’s elements and sliding them back and forth we’re going to use CSS3 3d transforms on the x axis. Here is the CSS to make this happen:

/* Checkbox */
.checkbox {
	display: -webkit-box;
	-webkit-box-orient: horizontal;
	-webkit-box-pack:justify;
	-webkit-box-sizing: border-box;
	-webkit-tap-highlight-color: transparent;
	width: 94px;
	overflow: hidden;
	-webkit-border-radius: 6px;
	text-align: center;
	line-height: 28px;
	cursor: pointer;
	-webkit-user-select: none;
	position: absolute;
	right: 10px;
	top: 7px;
}
.checkbox > input[type="checkbox"] {
	display: none;
}
.checkbox .thumb {
	-webkit-border-radius: 7px;
	position: relative;
	z-index: 3;
	border: solid 1px #919191;
	-webkit-transition: all 0.125s  ease-in-out;
	-webkit-transform: translate3d(0px,0%,0%);
}
.checkbox .thumb span {
	display: block;
	-webkit-box-sizing: border-box;
	height: 25px;
	width: 38px;
	border-top: solid 1px #efefef;
	-webkit-border-radius: 6px;
	background-image: -webkit-gradient(linear, left top, left bottom, from(#cecece), to(#fbfbfb));
	border-top: solid 1px #efefef;
	position:relative;
}
.checkbox .on {
	color: #fff;
	background-image: 
		-webkit-gradient(linear, left top, left bottom, 
			from(#295ab2), 
			to(#76adfc));
	width: 54px;
	padding-right: 4px;
	border: solid 1px #093889;
	-webkit-border-top-left-radius: 6px;
	-webkit-border-bottom-left-radius: 6px;
	margin-right: -6px;
	height: 25px;
	-webkit-transition: all 0.125s  ease-in-out;
	position: relative;
	-webkit-transform: translate3d(0px,0%,0%);
}
.checkbox .off {
	color: #666;
	background-image: -webkit-gradient(linear, left top, left bottom, from(#b5b5b5), color-stop(0.50, #fff));
	width: 54px;
	padding-left: 4px;
	border: solid 1px #a1a1a1;
	-webkit-border-top-right-radius: 6px;
	-webkit-border-bottom-right-radius: 6px;
	margin-left: -6px;
	height: 25px;
	-webkit-transition: all 0.125s  ease-in-out;
	position: relative;
	-webkit-transform: translate3d(-54px,0%,0%);
}
.checkbox.unchecked .thumb {
	-webkit-transform: translate3d(-54px,0%,0%);
}
.checkbox.checked .thumb {
	-webkit-transform: translate3d(0px,0%,0%);
}
.checkbox.unchecked .on {
	-webkit-transform: translate3d(-60px,0%,0%);
}
.checkbox.checked .on {
	-webkit-transform: translate3d(0px,0%,0%);
}
.checkbox.unchecked .off {
	-webkit-transform: translate3d(-54px,0%,0%);
}
.checkbox.checked .off {
	-webkit-transform: translate3d(6px,0%,0%);
}
/* For Very Important changes, use the orange checkbox */
.checkboxBase.important .on {
	border: solid 1px #d87100;
	background-image: -webkit-gradient(linear, left top, left bottom, from(#e75f00), color-stop(.5, #ff9c12));
}
/* End Checkbox */

To make the switch more realistic, I’m transforming all three pieces of the switch at the same time. This gives the switch a more realistic feeling. Notice the comment in at the end of the above CSS about the important class. You can use this to indicate a switch that makes a very important change. This class changes the default switch’s blue color to bright orange. This is the color Apple uses to show that a switch’s action is very important.

Having the CSS defined for the look and animation brings us close to the finished control, but we need to write some JavaScript to make the switch interactive. The JavaScript needs to do two things: toggle the classes “checked” and “unchecked” on the switch, and toggle the checked value of the checkbox between true and false. I’m using the ChocolateChip JavaScript framework to do this. You can switch my code to whatever library you want. If you know basic JavaScript, it shouldn’t be hard. Here’s the JavaScript to make it happen:

Element.prototype.toggleSwitch = function() {
	if (this.hasClass("switch")) {
		if (this.last().checked === true) {
			this.last().checked = false;
			this.toggleClass("checked", "unchecked");
		} else {
			this.last().checked = true;
			this.toggleClass("checked", "unchecked");
		}
	} else {
		return false;
	}
};

The last() used in the code above is a ChocolateChip method to return the last child of the control, which happens to be the checkbox input. That way we can set its checked state to true or false.

Now that we have the code to setup up the switch control, we can make it work as follows:

$(".switch").forEach(function(checkbox) {
	checkbox.bind("click", function() {
		this.toggleSwitch();
	});
	
	checkbox.bind("touchstart", function(e) {
		e.preventDefault();
		this.toggleSwitch();
	});
}); 

That’s it to make the switch switchable. But to make it do something you’d need a bit more as well. In my example, I’m getting some values from the switch and outputting it to a response field like this:

$(".switch").forEach(function(checkbox) {
	checkbox.bind("click", function() {
		if (this.last().checked === true) {
			$("#switchResponse").fill(
				this.last().getAttribute("value"));
		} else {
			$("#switchResponse").fill(
				this.last().getAttribute("offvalue"));
		} 
	});
	
	checkbox.bind("touchstart", function(e) {
		if (this.last().checked === true) {
			$("#switchResponse").fill(
				this.last().getAttribute("value"));
		} else {
			$("#switchResponse").fill(
				this.last().getAttribute("offvalue"));
		}
	});
}); 

You can try this out online or download the source code.

iPhone Modal Popup with HTML5, CSS3 & JavaScript

Works on Desktop Safari, Desktop Google Chrome, iPhone, iPod Touch, iPad. Note that I’ve included some styling for Firefox, even though it has no presence to speak of in the mobile space. In particular, Firefox 4 beta still lacks support for CSS3 keyframe animation, although that will make it into a later update.

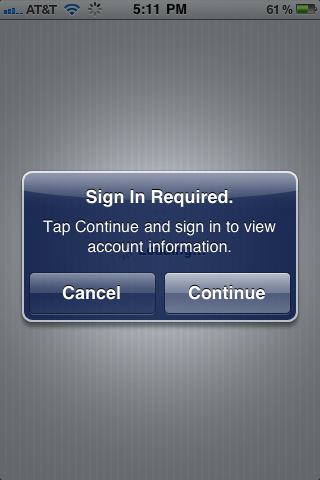
If you’ve used an iPhone, iPod Touch or iPad, then you’re familiar with the modal popup dialog boxes that the native system uses. Here’s a typical iPhone popup:
Native iPhone modal popup

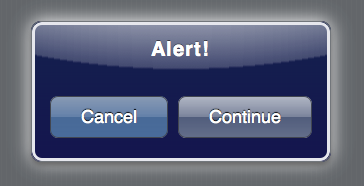
Notice the white radial gradient behind the popup. I was able to replicate this, but when the user was on a long document and scrolled down to do something that would trigger a popup, I could find no way to center that radial gradient based on the vertical page scroll. I therefore went with a whitesh blur around the popup itself using a CSS3 box shadow. Here’s what my HTML5/CSS3 version looks like:

Originally I thought I would use just one popup per app, re-assigning values to the popup’s part each time the popup was invoked. However I ran into the problem of events from different and I failed to find an elegant way to resolve this. I therefore came up with a scheme where you initialize a popup at the view level, allowing each view to have a custom popup. The initializing script creates the popup and injects it as the last child of the view. The setup script creates the markup for the popup and populates it with values passed as an argument to the initializing script. The setup script also adds basic functionality to the buttons so that clicking either of them will close the popup. The setup script also creates a screen cover which traps events to prevent user interaction with what is behind the popup until it is closed.

The setup script accepts a single argument—an object literal containing key/values pairs to populate the popup. In order for the setup script to create a popup, you must at least pass a value for a valid view in your Web app. This would be like selector: "#Popup". If no other values are passed, the script will produce a basic popup that looks like this:
Basic popup

I used the ChocolateChip mobile JavaScript library to add the interactive functionality to the popup. Here’s the JavaScript that creates the markup and functionality for the popup:

/** 
* 
* A method to initialize a modal popup. By passing a valid selector for a view, this method creates a view based popup with the properties supplied by the options argument. It automatically binds events to both popup buttons to close the popup when the user clicks either. If a callback is passed as part of the opts argument, it gets bound to the "Continue" button automatically.
*
* @method
* 
* ### setupPopup
*
* syntax:
*
*  $.setupPopup({selector: "#News", title: "Subscribe", cancel: });
*
* arguments:
* 
*  - string: string A valid selector for the parent of the tab control. By default the an object literal.
*  - string: string An object literal which can have the following properties:
	title: a string defining the title in the popup.
	message: a string defining the popup message.
	cancelButton: a string defining an alternate name for the cancel button.
	continueButton: a string defining an alternate name for the confirm button.
	callback: a function to run when the user touches the confirm button.
	If no title is supplied, it defaults to "Alert!".
	If no cancelButton value is supplied, it defaults to "Cancel".
	If no continueButton value is supplied, it defaults to "Continue".
* example:
*
*  $.setupPopup({selector: "#buyerOptions"});
*  $.setupPopup({
		selector: "#Popup",
		title: 'Attention Viewers!', 
		message: 'This is a message from the sponsors. Please be seated while we are getting ready. Thank you for your patience.', 
		cancelButton: 'Skip', 
		continueButton: 'Stay for it', 
		callback: function() {
			$('#popupMessageTarget').fill('Thanks for staying with us a bit longer.');
			$('#popupMessageTarget').removeClass("animatePopupMessage");
			$('#popupMessageTarget').addClass("animatePopupMessage");
		}
	});
*
*/
$.setupPopup = function( opts ) {
	if (opts.selector) {
		var selector = opts.selector;
	} else {
		return false;
	}
	var title = "Alert!";
	if (opts.title) {
		var title = opts.title;
	}
	var message = "";
	if (opts.message) {
		var message = opts.message;
	}
	var cancelButton = "Cancel";
	if (opts.cancelButton) {
		cancelButton = opts.cancelButton;
	}
	var continueButton = "Continue";
	if (opts.continueButton) {
		continueButton = opts.continueButton;
	}
	var popup = '<div class="screenCover hidden"></div>';
	popup += '<section class="popup hidden"><div>';
	popup += '<header><h1>' + title + '</h1></header>';
	popup += '<p>' + message +'</p><footer>';
	popup += '<div class="button cancel">' + cancelButton + '</div>';
	popup += '<div class="button continue">' + continueButton + '</div></footer></div></section>';
	$(selector).insertAdjacentHTML("beforeEnd", popup);
	// Bind event to close popup when either button is clicked.
	$$(selector + " .button").forEach(function(button) {
		button.bind("click", function() {
			$(selector + " .screenCover").addClass("hidden");
			$(selector + " .popup").addClass("hidden");
		});
	});
	
	if (opts.callback) {
		var callbackSelector = selector + " .popup .continue";
		$(callbackSelector).bind("click", function() {
			opts.callback();
		});
	}
	
};

And here is an initialization of a popup:

$.setupPopup(
	{
		selector: "#Popup",
		title: 'Attention Viewers!', 
		message: 'This is a message from the sponsors. Please be seated while we are getting ready. Thank you for your patience.', 
		cancelButton: 'Skip', 
		continueButton: 'Stay for it', 
		callback: function() {
			$('#popupMessageTarget').fill('Thanks for staying with us a bit longer.');
                        // Remove this class in case the popup was opened previously.
			$('#popupMessageTarget').removeClass("animatePopupMessage");
                        // Then add the class to trigger an animation of the message being displayed.
			$('#popupMessageTarget').addClass("animatePopupMessage");
		}
	}
);

Now that a popup has been created and populated with the desired values, we need a way to show it. Before actually showing the popup, the $.showPopup method display a screen cover which captures user interaction and thereby prevents the interface behind the popup from being accessed until the popup is dispelled. The showPopup method accepts one argument, a selector indicating a uniquely identifiable node that contains the popup as a descendant.

$.showPopup = function( selector ) {
	var screenCover = $(selector + " .screenCover");
        // Make the screen cover extend the entire width of the document, even if it extends beyond the viewport.
	screenCover.css("height:" + (window.innerHeight + window.pageYOffset) + "px");
	var popup = $(selector + " .popup");
	$(selector + " .popup").style.top = ((window.innerHeight /2) + window.pageYOffset) - (popup.clientHeight /2) + "px";
	$(selector + " .popup").style.left = (window.innerWidth / 2) - (popup.clientWidth / 2) + "px";
	$(selector + " .screenCover").removeClass("hidden");
	$(selector + " .popup").removeClass("hidden");
};

With this method defined we can now show the popup as need. Here’s a script that attaches an event handler to a button with a class of “openPopup” for a popup somewhere among the descendant nodes of a node with an id of “Tabs”:

$("#Tabs .openPopup").bind("click", function() {
	$.showPopup("#Tabs");
});

OK, so we have the markup and functionality for the popup, but we don’t have the look. We’ll take care of that next. In order to create the unique look of the iPhone popup, I use several layers for encasing borders and composited transparent background gradients. Originally I had two gradients, the dark blue linear gradient and the whitish radial gradient, layered on top of each other as multiple backgrounds. But Google Chrome had a problem rendering the underlying linear gradient, ignoring its transparent alpha values and rending the colors as opaque. I was therefore forced to break them out into separate elements. The end result is the same. When the popup is created by the setup script, it is given a class of “hidden.” This defines its scale as 0% and its opacity as 0%. When we execute the showPopup method, it removes that “hidden” class. Because the popup has basic transitions properties defined on it, its scale and opacity transition from zero to full, making it appear to popup out of no where. The scripts also always make sure that the popup is centered in the viewport, regardless of where it was displayed when scrolling down a long document.

For their modal popups, Apple always indicates the default button, what would be equivalent to a submit or OK button, with slightly lighter colors so that it stands out from the other button, which is the equivalent of a cancel/close button. I have the buttons located in a footer and I use CSS3’s flexible box model styles to make the buttons position and size them selves according to available space.

/* Modal Popup Styles */
section.popup {
	width: 75%;
	max-width: 300px;
	border: solid 1px #72767b;
	-webkit-box-shadow: 0px 4px 6px #666, 0 0 50px rgba(255,255,255,1);
	-moz-box-shadow: 0px 0px 1px #72767b,  0px 4px 6px #666;
	box-shadow: 0px 0px 1px #72767b, 0px 4px 6px #666;
	-webkit-border-radius: 10px;
	-moz-border-radius: 10px;
	border-radius: 10px;
	padding: 0px;
	opacity: 1;
	-webkit-transform: scale(1);
	-webkit-transition: all 0.25s  ease-in-out;
	position: absolute;
	z-index: 1001;
	margin-left: auto;
	margin-right: auto;
	background-image: 
		-webkit-gradient(linear, left top, left bottom,
			from(rgba(0,15,70,0.5)),
			to(rgba(0,0,70,0.5)));
}
section.popup.hidden {
	opacity: 0;
	-webkit-transform: scale(0);
	top: 50%;
	left: 50%;
	margin: 0px auto;
}
section.popup > div {
	border: solid 2px #e6e7ed;
	-webkit-border-radius: 10px;
	-moz-border-radius: 10px;
	border-radius: 10px;
	padding: 10px;
	background-image: 
	   -webkit-gradient(radial, 50% -1180, 150, 50% -280, 1400,
		   color-stop(0, rgba(143,150,171, 1)),
		   color-stop(0.48, rgba(143,150,171, 1)),
		   color-stop(0.499, rgba(75,88,120, .9)),
		   color-stop(0.5, rgba(75,88,120,0)));
	color: #fff;
	text-shadow: 0px -1px 1px #000;
}
section.popup header {
	background: none;
	-webkit-border-top-left-radius: 10px;
	-webkit-border-top-right-radius: 10px;
	-moz-border-radius-topleft: 10px;
	-moz-border-radius-topright: 10px;
	border-top-left-radius: 10px;
	border-top-right-radius: 10px;
	border: none;
	color: #fff;
	text-shadow: 0px -2px 1px #000;
}
section.popup header > h1 {
	letter-spacing: 1px;
}
section.popup footer
{
	display: -webkit-box;
	-webkit-box-orient: horizontal;
	-webkit-box-pack:justify;
	-webkit-box-sizing: border-box;
	display: -moz-box;
	-moz-box-orient: horizontal;
	-moz-box-pack:justify;
	-moz-box-sizing: border-box;
}
section.popup footer > .button {
	-webkit-box-flex: 2;
	-moz-box-flex: 1;
	display: block;
	text-align: center;
	-webkit-box-shadow: none;
	-moz-box-shadow: none;
	box-shadow: none;
	margin: 10px 5px;
	height: 32px;
	font-size: 18px;
	line-height: 32px;
	-webkit-border-radius: 8px;
}
section.popup footer > .button.cancel {
	background-image: 
		-webkit-gradient(linear, left top, left bottom, 
			from(#828ba3), 
			color-stop(0.5, #4c5a7c), 
			color-stop(0.5, #27375f), 
			to(#2e3d64));
}
section.popup footer > .button.continue {
	background-image: 
		-webkit-gradient(linear, left top, left bottom, 
			from(#b0b6c4), 
			color-stop(0.5, #7a839b), 
			color-stop(0.5, #515d7c), 
			to(#636e8a));
}
section.popup footer > .button:hover, .popup footer > .button.hover {
	background-image: 
		-webkit-gradient(linear, left top, left bottom, 
			from(#70747f), 
			color-stop(0.5, #424857), 
			color-stop(0.5, #171e30), 
			to(#222839));
}
.screenCover {
	width: 100%;
	height: 100%;
	display: block;
	background-color: rgba(0,0,0,0.5);
	position: absolute;
	z-index: 1000;
	top: 0px;
	left: 0px;
}
.screenCover.hidden {
	display: none;
}

You can try this out online or download the source code to play around with it.

iPad Style Split Layout with Flexible Box Model

Works in Safari, Firefox, Chrome, iPhone, iPad, Android

In a previous post we looked at how CSS3’s flexible box model allowed us to create horizontal alignment of elements. There are several other features in the flexible box model that allow us to create layouts that would require complicated CSS hacks or JavaScript: equal height columns. You know the kind of layout I’m talking about. A header with several columns of material and a footer. You want the columns to always be the same height. You can use a table, but that can introduce a certain nasty kudginess to what you’re trying to achieve. Or you could use background images with nested divs, which is another type of kludginess. Or you could use some JavaScript, which introduces another type of kludginess.

With the flexible box model you can accomplish the equal height columns with a few CSS3 properties. What we’re going to do is show how to put together a typical split-level iPad layout with equal height sections. Here’s what we’re shooting for:
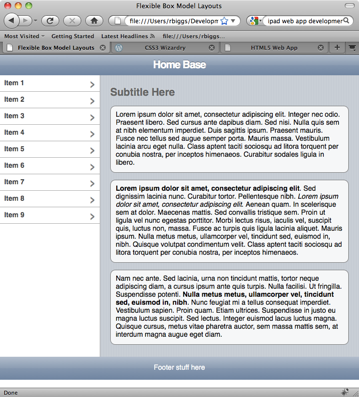
Example Layout with Equal Height Columns using CSS3 Flexible Box Model

To create the layout in this image, we’ll use the following markup:

<!DOCTYPE HTML>
<html lang="en">
<head>
	<meta charset="utf-8">
	<meta name="viewport" content="width=device-width; height=device-height; initial-scale=1.0, maximum-scale=1.0, user-scalable=0;">
	<meta name="apple-mobile-web-app-capable" content="yes">
	<title>Flexible Box Model Layouts</title>
	<style type="text/css">
	</style>
</head>
<body>
<article>
	<header>
		<h1>Home Base</h1>
	</header>
	<section>
		<aside>
			<nav>
				<ul>
					<li><a href="#">Item 1</a></li>
					<li><a href="#">Item 2</a></li>
					<li><a href="#">Item 3</a></li>
					<li><a href="#">Item 4</a></li>
					<li><a href="#">Item 5</a></li>
					<li><a href="#">Item 6</a></li>
					<li><a href="#">Item 7</a></li>
					<li><a href="#">Item 8</a></li>
					<li><a href="#">Item 9</a></li>
				</ul>
			</nav>
		</aside>
		<section>
			<h2>Subtitle Here</h2>
			<p>Lorem ipsum dolor sit amet, consectetur adipiscing elit. Integer nec odio. Praesent libero. Sed cursus ante dapibus diam. Sed nisi. Nulla quis sem at nibh elementum imperdiet. Duis sagittis ipsum. Praesent mauris. Fusce nec tellus sed augue semper porta. Mauris massa. Vestibulum lacinia arcu eget nulla. Class aptent taciti sociosqu ad litora torquent per conubia nostra, per inceptos himenaeos. Curabitur sodales ligula in libero. </p>

			<p><b>Lorem ipsum dolor sit amet, consectetur adipiscing elit</b>. Sed dignissim lacinia nunc. Curabitur tortor. Pellentesque nibh. <i>Lorem ipsum dolor sit amet, consectetur adipiscing elit</i>. Aenean quam. In scelerisque sem at dolor. Maecenas mattis. Sed convallis tristique sem. Proin ut ligula vel nunc egestas porttitor. Morbi lectus risus, iaculis vel, suscipit quis, luctus non, massa. Fusce ac turpis quis ligula lacinia aliquet. Mauris ipsum. Nulla metus metus, ullamcorper vel, tincidunt sed, euismod in, nibh. Quisque volutpat condimentum velit. Class aptent taciti sociosqu ad litora torquent per conubia nostra, per inceptos himenaeos. </p>
			
			<p>Nam nec ante. Sed lacinia, urna non tincidunt mattis, tortor neque adipiscing diam, a cursus ipsum ante quis turpis. Nulla facilisi. Ut fringilla. Suspendisse potenti. <b>Nulla metus metus, ullamcorper vel, tincidunt sed, euismod in, nibh</b>. Nunc feugiat mi a tellus consequat imperdiet. Vestibulum sapien. Proin quam. Etiam ultrices. Suspendisse in justo eu magna luctus suscipit. Sed lectus. Integer euismod lacus luctus magna. Quisque cursus, metus vitae pharetra auctor, sem massa mattis sem, at interdum magna augue eget diam. </p>
		</<span class="hiddenGrammarError" pre=""><span class="hiddenGrammarError" pre="">section>
	</section</span></span>>
	<footer>
		<p>Footer stuff here</p>
	</footer>
</article>
</body>
</html>

If you load this markup in a browser, it’ll be pretty plain. Let’s add some basic styling for the header, footer, list menu, etc. First we’ll get rid of the defaults for the body and list elements.

html, body {
	margin: 0px;
	padding: 0px;
	font: normal 14px/16px Helvetica, Sans-serif;
}
ul, li {
	list-style: none;
	padding: 0px;
	margin: 0px;
}

Next, for Firefox, we need to indicate that the HTML5 tags are block elements. The latest versions of Webkit in Safari, iPhone and iPad already recognize these tags and display them properly.

/* for Firefox */
article, header, section, nav, aside, footer {
	display: block;
}
/* end Firefox */

Now we need to add the styles to give are markup a more polished look. We’re going to add CSS3 background gradients, rgba color and border radius:

section > section {
	padding: 10px 20px;
	background-color: #cbd2d8;
	background-image: -webkit-gradient(linear, left top, right top, from(#c5ccd4), color-stop(0.75, #c5ccd4), color-stop(0.75, transparent), to(transparent)); 
	background-image: -moz-linear-gradient(left, #c5ccd4, #c5ccd4 75%, transparent 75%, transparent);
	-webkit-background-size: 5px 100%;
	-moz-background-size: 5px 100%;
}
header {
	background-color: #b0bccd;
	background-image: -webkit-gradient(linear, left top, left bottom, 
		from(#b0bccd), 
		color-stop(0.5, #889bb3), 
		color-stop(0.5, #8195af), 
		to(#6d84a2));
	background-image: -moz-linear-gradient(top, #b0bccd, #889bb3 50%, #8195af 50%, #6d84a2); 
	padding: 10px 10px;
}
header h1 {
	text-align: center;
	font: bold 21px/21px Helvetica, Arial, Sans-serif;
	letter-spacing: -1px;
	text-shadow: 0px -1px 0px rgba(0, 0, 0, 0.5);
	color: #fff;
	margin: 0px;
}
footer {
	background-color: #b0bccd;
	background-image: -webkit-gradient(linear, left top, left bottom, 
		from(#b0bccd), 
		color-stop(0.5, #889bb3), 
		color-stop(0.5, #8195af), 
		to(#6d84a2));
	background-image: -moz-linear-gradient(top, #b0bccd, #889bb3 50%, #8195af 50%, #6d84a2); 
	padding: 1px 0px;
	text-align: center;
	color: #fff;
}
nav li > a {
	text-decoration: none;
	display: block;
	padding: 8px 10px;
}
nav li > a {
	cursor: pointer;
	padding: 8px;
	border-bottom: 1px solid #acacac;
	background-color: #fff;
	font-weight: bold;
	color: rgba(0,0,0,.75);
}
nav li > a:after {
	content: "›";
	font: normal 28px/28px Verdana;
	color: rgba(0,0,0,.5);
	display: block;
	float: right;
	margin-top: -6px;
}
nav li > a:hover {
	background-image: -moz-linear-gradient(top, #4286f5, #194fdb);
	background-image: -webkit-gradient(linear, left top, left bottom, from(#4286f5), to(#194fdb));
	color: #fff;
}
nav li > a:hover:after {
	color: #fff;
}
h2 {
	color: #666;
	text-shadow: 0px -1px 1px #fff;
}
section > p {
	-webkit-border-radius: 10px;
	-moz-border-radius: 10px;
	background-color: rgba(255,255,255,0.85);
	border: solid 1px rgba(0,0,0,0.5);
	padding: 10px;
}

This gives us a layout that looks like this:
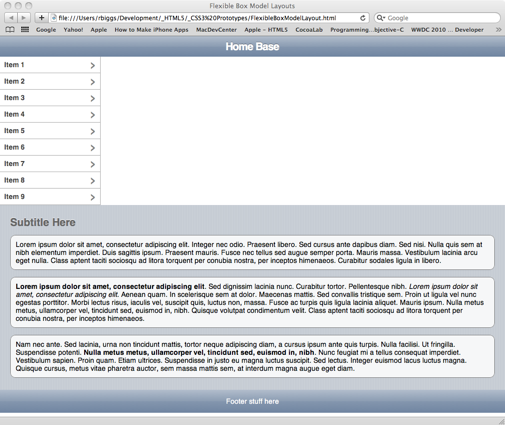
Style Layout Without Flexible Box Model Applied

This doesn’t look too bad, except that we want to the list to be on the left, and the content to be on the right. Normally, to achieve that we would need to put the content section before the list and float it right and then float the list left. Then we’d need to clear that float on the footer. That would work visually, except that neither the list nor the content would know about the other’s height. Or we could use relative and absolute position, and basically have the same problem. Or we could use CSS3’s flexible box model and have no problems at all, well, unless you really, really need to support IE, any version. You could use this for the god browsers and use conditional comments to give IE some crappy float arrangement. Honestly, I would to that to IE without thinking about it.

So, if you look at the document markup, we have an article tag with a header tag, section tag and footer tag as its children. The section tag has and aside tag and another section tag as its children. To make those work they way we want we need to give the parent section tag some flex power:

article > section {
	display: -webkit-box;
	-webikit-box-orient: horizontal;
	-webkit-box-align: stretch;
	display: -moz-box;
	-moz-box-orient: horizontal;
	-moz-box-align: stretch;
	-moz-box-lines: multiple;
}

This will give us cause the aside and section tags to align horizontally in their parent and each will have the same height. However in both Webkit and Firefox they both have some other issues with understanding how to deal with the long, wrapping content in the section tag.

Equal Height Columns in Firefox with Width Adjustment ProblemsEqual Height Columns in Safari with Width Adjustment Problems

To fix the problem with the browsers not knowing how to handle the wrapping content we just need to add a flexible box value to the section tag with the content:

section > section {
	-webkit-box-flex: 1;
	-moz-box-flex: 1;
}

What this does is tell the browser that the child section tag’s width should be whatever space is left over from that occupied by the aside tag, it’s sibling in the same container. Since the aside has a defined width of 200 pixels, the browser will give the rest to the section tag. Suddenly our layout is looking and acting the way you’d expect. It will even expanding dynamically as you resize the browser window.

You can try it out live or download the source.

CSS3 Layouts with Horizontal Alignment

Works with Safari, Chrome, Firefox, iPhone, iPad, Android

One of the most common features in modern Web layouts is to have some with a fixed width on one side or on both sides, with the rest of the space taken up dynamically. This is usually accomplished by floating the first item to the right and the second item to the left, or by using relative and absolute position. With CSS3 there is another, better way. No floats, no clearing floats, no positioning. Instead we use the properties of the flexible box model. The magic all starts with a new display property: box. At the moment, you’ll need to use the -moz and -webkit prefixes to implement these features. They have been supported since version 3 of both Firefox and Safari. If the majority of your users are on Firefox, Chrome and Safari, or if you’re targeting the mobile Web, you can go ahead and use these properties today and achieve the kind of layouts that previously required complex CSS frameworks or JavaScript libraries like YUI or Ext.js. The flexible box model allows us to create the equivalent of stack panels and wrap panels with HTML.

Let’s get started. We’ll create and HTML5 document with a header tag. We’ll style the header and style two links inside it to look like buttons:

<!DOCTYPE HTML>
<html lang="en">
<head>
	<meta charset="utf-8">
	<title>Flexible Box Model Example One</title>
	<style type="text/css">
		html, body {
			margin: 0px;
			padding: 0px;
			font: normal 14px/16px Helvetica, Sans-serif;
		}
		header {
			/* The following line is for Firefox */
			width: 100%;
			padding: 5px 0px;
			background-image: -moz-linear-gradient(top, #b0bccd, #889bb3 50%, #8195af 50%, #6d84a2); 
			background-image: -webkit-gradient(linear, left top, left bottom, from(#b0bccd), color-stop(0.5, #889bb3), color-stop(0.5, #8195af), to(#6d84a2));
		}
		.button
		{
			color: #fff;
			text-decoration: none;
			display: block;
			padding: 4px 10px;
			-webkit-border-radius: 5px;
			-moz-border-radius: 5px;
			font: normal 14px/16px Helvetica, Arial, sans-serif;
			cursor: pointer;
		}
		
		.button.black {
			background-image: -webkit-gradient(linear, left top, left bottom, 	
				from(#7d828c),
				color-stop(0.5, #303749), 
				color-stop(0.5, #121a2e), 
				to(#121a2e));
			background-image: -moz-linear-gradient(top, #7d828c, #303749 50%, #121a2e 50%, #121a2e);
			border: solid 1px rgba(79, 79, 79, 0.75);
		}
		.button.black:hover {
			background-image: -webkit-gradient(linear, left top, left bottom, 
				from(#4286f5), 
				color-stop(0.5, #4286f5),
				color-stop(0.5, #194fdb),
				to(#194fdb));
			
			background-image: -moz-linear-gradient(top, #4286f5, #4286f5 50%, #194fdb 50%, #194fdb);
		}
		.button.back {
			margin-left: 20px;
		}
		.button.next {
			margin-right: 20px;
		}
	</style>
</head>
<body>
	<article>
		<header>
			<a class="button black back">Back</a>
			<a class="button black next">Next</a>
		</header>
	</article>
</body>
</html>

This will give us a layout like this:
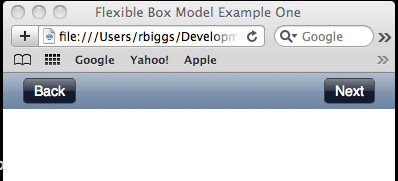
Initial setup for a header tag that will use the flexible box model

Now we’ll add the magic. All we have to do is give the header tag a definition of display: box, then tell it which orientation to arrange its child elements and how to pack them in. We just need to add these properties to the header tag’s CSS:

display: -webkit-box;
-webkit-box-orient: horizontal;
-webkit-box-pack:justify;
display: -moz-box;
-moz-box-orient: horizontal;
-moz-box-pack:justify;

By telling the browser to pack the child elements with justification, the browser takes all the space not occupied by the buttons and spreads it out between them. This works as expected in all Webkit based browsers. Unfortunately, although Firefox has implemented every other feature of the flexible box model, they have not as yet implemented the box-pack: justify property. It’s listed on their developer site with a question mark: https://developer.mozilla.org/en/CSS/-moz-box-pack

In the next section of this post I’ll introduce a technique that requires some extra markup that will make this work in Firefox too. For now, here is how this looks in Webkit:
Header tag with buttons aligned at both end using the flexible box model

You can see it in action, or download the document.

Adding Centered Content With Dynamic Width

Now we’ll look at how to add a title into our heading. Since we already have two buttons at either end, we’ll want our title to be centered. We’ll add an h1 tag to the header directly between the two buttons:

<body>
	<article>
		<header>
			<a class="button black back">Back</a>
			<h1>Home Base</h1>
			<a class="button black next">Next</a>
		</header>
	</article>
</body>

We also need to give the h1 some suitable styling. We’re going to make it white with an indented look using a text shadow:

h1 {
	font: bold 21px/21px Helvetica, Arial, Sans-serif;
	text-shadow: 0px -1px 0px rgba(0, 0, 0, 0.5);
	color: #fff;
	margin: 0px;
	-moz-box-flex: 1;
	text-align: center;
}

This gives us the following in Webkit:
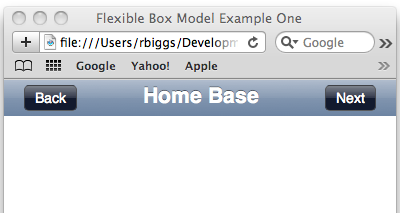
Buttons on either end and title centered

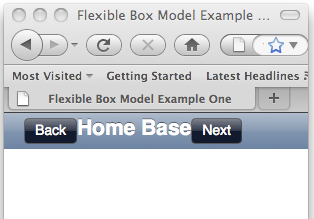
Unfortunately, Firefox still needs a couple more lines of code to get it right. Here’s what we have at the moment:
Firefox having problems implementing the flexible box model

There is one more flexible box model property that we can apply to the h1 so that Firefox will display it as we want, that is box-flex. If we give this property a value of one, it tells the browser to have that elements width the equivalent of all left over space from whatever other sibling elements are in the same parent tag. We’ll also need to apply text-alignment to center the text:

h1 {
	font: bold 21px/21px Helvetica, Arial, Sans-serif;
	text-shadow: 0px -1px 0px rgba(0, 0, 0, 0.5);
	color: #fff;
	margin: 0px;
	-moz-box-flex: 1;
	text-align: center;
}

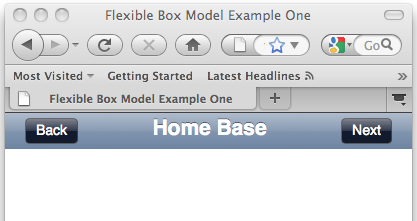
Now Firefox display the header as we want:
h1 { 	font: bold 21px/21px Helvetica, Arial, Sans-serif; 	text-shadow: 0px -1px 0px rgba(0, 0, 0, 0.5); 	color: #fff; 	margin: 0px; 	-moz-box-flex: 1; 	text-align: center; }

You can check out the finished page, or download it.

Update: October 5, 2010

I’ve update these buttons to use subpixel rendering. You can read about the technique here. You can try this out online or download the source code.

iPad Dropdown Menu with CSS3

Works with Safari, iPhone, iPad

One thing noticeable about the iPad’s interface, in contrast to that of the iPhone, is the gorgeous dropdown menus. They have a highly polished look with their gradients and drop shadows. For a while now I was wondering if it would be possible to re-create their look using only CSS3. If you haven’t seen them yet, here is a sample:

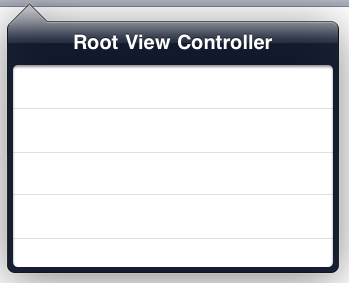
Typical iPad dropdown menu

With CSS3 we can easily create the rounded corners, gradients and drop shadows. But what about the menu pointer? That part had me scratching my head for a while. I debated whether to use a canvas element. But I had already decided that I would pull this off using only CSS3. So, what I decided to do was use a rotated div. First I filled it with the last color at the top of the gradient that I used on the top of the menu. Since I was going to rotate the div, I didn’t need border on all four sides, just one two. I was rotating the div 90 degrees, so I gave it a border matching the menu on the left and bottom. Of course after rotating the div I still had the problem of the other half of the div. To remove it I used a CSS3 image mask. For the image I used a CSS3 gradient that went from solid black halfway and then turned transparent. Since the div was rotated 45 degrees, I needed to create a gradient mask from the bottom left to the top right:

-webkit-transform: rotate(45deg);
-webkit-mask-image: -webkit-gradient(linear, left top, right bottom, from(#000000), color-stop(0.5,#000000), color-stop(0.5, transparent), to(transparent));

This effective cut the div in half diagonally. I then used position to move the div to where it needed to be.

I originally designed this menu to work on desktop Safari/Chrome so that I could mimic the iPad menus. However, it also works on the iPad. The desktop version has some subtle differences because I used inset box shadows to create depth. That won’t be on the iPad until the iOS 4 update.

You can see the finished example or download the source to see how I put it together.

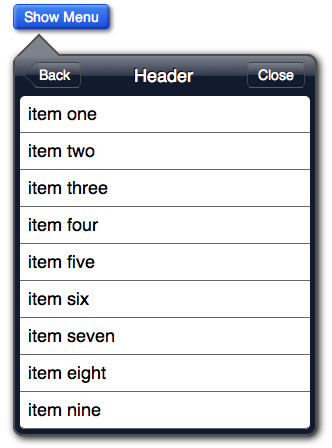
And here’s the finished menu using only CSS3:
An iPad style dropdown menu create with CSS3